Pinlock® Ready Faceshield
FACESHIELD REPLACEMENT
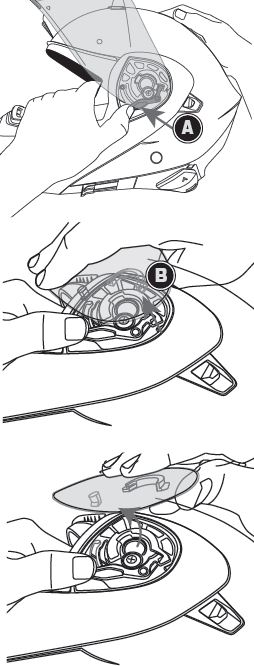
1. Open the faceshield.
2. Push up the faceshield release lever (A) to tilt the axis hook of the faceshield (B).
3. If the faceshield axis hook is released from the ratchet as shown in the left, you can let go of the faceshield release lever. Then lift up the faceshield to the direction of the helmet front until it is totally separated from the ratchet.
4. Do the same in the other side to completely remove it.
5. Reverse the process on both sides when you assemble your faceshield to the helmet ratchet.
6. After you assemble it, make sure the shield axis hook sits at its proper position by fully opening and closing it several times. In most cases you can hear a “click” sound when the hook sits at the axis hole.
Also, you can refer to the below video tutorial for more details
(source: BikerHeadz.co.uk).
SpeedView® Retractable Sunvisor
SUNVISOR OPERATION
NOTE: THE RETRACTABLE INTERNAL SUN VISOR CAN BE LOWERED AND RETRACTED WITH EITHER THE FACE SHIELD AND/OR THE CHIN BAR IN THE OPEN OR CLOSED POSITION.
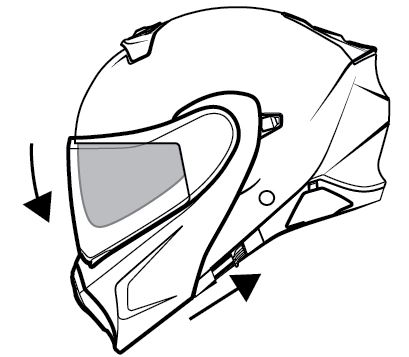
To lower the sun visor,
simply slide the lever towards the back of the helmet.
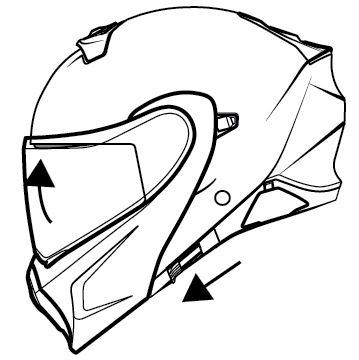
To retract the sun visor,
simply slide the lever towards the front of the helmet.
SUNVISOR REMOVAL/INSTALLATION
NOTE: ENSURE THAT THE CHIN BAR IS IN THE FULLY OPENED POSITION, THEN LOWER THE SUN VISOR TO THE LOWEST POSSIBLE POSITION.
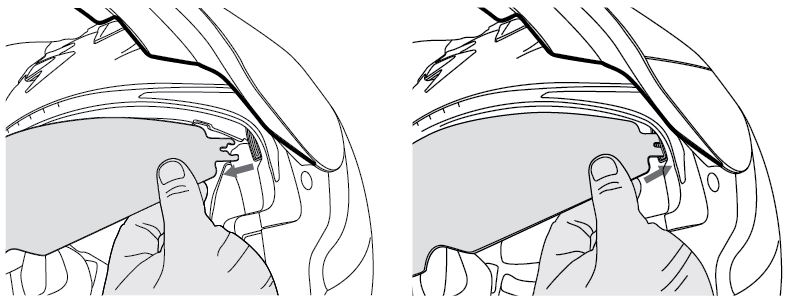
While holding the sun visor firmly, gently pull the sun visor free from its internal housing.
Repeat the process on the opposite side.
Reverse the process for sun visor installation.